Basketweave creates smooth, even stitches and beautiful needlepoint results.
Here are some simple tips for how to do the needlepoint basketweave stitch like a pro.
Basketweave is a member of the Tent stitch family, along with Continental and Half Cross stitch. They all look the same on the front of the canvas, but different on the reverse because of how these stitches are formed.

Needlepoint basketweave stitch may initially be confusing, but with practice, it becomes second-nature.
About Basketweave:
The stitch gets its name from the basketweave pattern formed on the back of the canvas.

This pattern creates a strong stitch with good coverage and minimal distortion. If your project will be finished as a pillow, a belt, a chair seat, a rug, or anything destined for some wear and tear, then strong is what you want.

When stitching basketweave, the needle always comes up in an empty hole on the canvas, so you are less likely to pierce a stitch already there, and your stitches will be smooth and even.
Read to the end of this article before starting to ensure you understand the nuances of how to stitch a perfect needlepoint basketweave.
How To Do A Needlepoint Basketweave Stitch
Needlepoint basketweave stitch forms a half cross on the front of the canvas, just like the Continental and Half Cross stitches. But, the stitches are laid down in diagonal lines rather than horizontal rows. Here’s a chart showing how to stitch in basketweave…

Start at the top right of the color area you are stitching.
Once you have stitched a few rows, flip your canvas over to check the basketweave pattern that has formed on the back of your needlepoint. If you’ve got something that looks like this, your needlepoint baskweave pattern is coming together beautifully.

Things To Know Before You Start Stitching Needlepoint Basketweave
Needlepoint Basketweave Tip #1. Stitch up the steps and down the poles.
The type of needlepoint canvas you are stitching on makes a difference to how you stitch basketweave.
Inspect your canvas, where the canvas threads weave together at the intersections. If you are stitching a hand-painted canvas, and most canvases from Poppy Monk needlepoint, you will almost certainly have a mono canvas. It looks like this…

On a mono canvas, the threads pass over and under each other as they intersect.
If you are stitching a needlepoint kit from another company or a design that originated outside of the United States, you may have an interlock canvas. The canvas threads pierce each other at the intersections and look like this…

Why does this matter when it comes to stitching needlepoint basketweave?
If you are stitching a mono canvas, the canvas threads slide over each other as they intersect - they are not locked together like they are with an interlock canvas. So, your stitching thread should optimally "tension" the needlepoint canvas so as not to slip under the canvas threads and warp or distort it.
To achieve optimal stitch tension on a mono canvas, stitch "up the steps and down the poles”.
A "pole" on your mono needlepoint canvas is where the canvas thread runs vertically and lies on top of the underlying horizontal thread.

A “step” on your mono needlepoint canvas is where the canvas thread runs horizontally and lies on top of the underlying vertical thread.

Can you see where the poles and steps are on your mono canvas?
When stitching Basketweave, the steps and poles determine whether you will stitch a diagonal up-row (going up the steps) or a diagonal down-row (sliding down the poles).
Here’s how this works in practice…
Locate the farthest right stitch intersection of the color area you will be stitching and determine whether the stitch will cover a step or a pole:

This is a "step" because the horizontal canvas thread lies on top. So, since we need to stitch "up the steps" you would actually start your stitching of this color area at the bottom of this diagonal row...

Your next row will be stitching down the "poles". Move across one intersection and start stitching down the diagonal...

This next image shows only the third line of stitches, going up the steps again.

Here's another example of where to start an area of Basketweave, this time using Santa's hat pompom (from the Santa in the Snow needlepoint kit):
The decision steps are:
What is the furthest top and right stitch of the design area? In this case, it's where the arrow is pointing in Step 1.
Is this upper-right stitch a step or a pole? In this case, it is a pole. So you need to slide down this diagonal row of poles. Therefore, you will start at the top, where the Step 2 arrow shows the first stitch placement.

What if you have an interlock canvas?
An interlock needlepoint canvas doesn’t have steps and poles, so it doesn’t matter in which direction you start the diagonal basketweave rows. Just start stitching and follow the basketweave chart.
The only thing you need to pay attention to on an interlock canvas is keeping the basketweave pattern going across the entire stitched design. So, if you finish a thread at the top of a diagonal row, you need to start the next one at the top of the row. (Tip: Park your needle with the point heading in the direction you will be going in. You can then leave your needlepoint and return to it knowing the direction of the parked needle will show you were to start.
Needlepoint Basketweave Tip #2. Secure your threads horizontally or vertically.
When finishing off a thread, secure it under basketweave stitches on the back of your canvas in a horizontal or vertical direction (rather than in a diagonal direction).
Needlepoint Basketweave Tip #3. Don't drag your thread too far.
Don’t carry your thread very far on the back of the canvas - no more than over 3 or 4 stitches - as it can pucker the canvas and affect how smooth the stitches look on the front. You are better to secure your thread and start afresh in any new area that is further than 3 or 4 stitches away.
Read our blog post on How to Navigate Around Objects with Basketweave Stitch.
Needlepoint Basketweave Tip #4. Keep shorter thread lengths.
A great feature of needlepoint basketweave is the full canvas coverage it provides. But this also means your threads will wear down more. Use shorter thread lengths, especially when dealing with boutique fibers. Wool will not wear as easily as velvet or fuzzy fibers, so the more delicate the thread, the shorter you should cut your thread lengths. Always start a new thread if the stitches are starting to thin out.
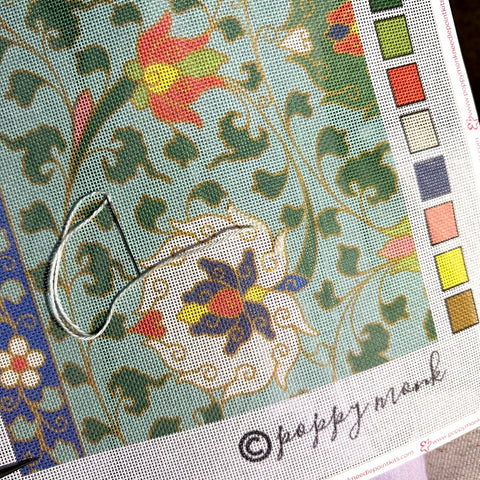
Starting to stitch the Chinese Ornamental needlepoint kit in Basketweave.
If you are ready for more needlepoint stitches check out our 5-Minute Needlepoint blog post on three easy needlepoint background or filler stitches.
For more information check out the American Needlepoint Guild's page on needlepoint basketweave stitch.
Sign up to our newsletter to be the first to receive 5-Minute Needlepoint Blog posts like this one and to get 10% off your first order (plus free shipping).
