Many needlepoint canvases have lettering, and if the lines are thin, the letters can be tricky to stitch. Here are four ideas for stitching needlepoint letters, at least one of which should suit the words on your canvas.
1. Use a Back Stitch For Needlepoint Lettering
The beauty of a back stitch is that it can follow the lines on the canvas regardless of the direction. Also, you can use a thinner thread for thin lines, or a thicker thread to 'fatten' the letters.

The letters on this Been There Regretted That needlepoint design were stitched in a Back stitch. Super simple, just make stitches of varying lengths that follow the letters on the canvas.
You can stitch directly onto the canvas and then fill in around the lettering with your other stitches (not too closely; it's OK to leave some room), or you can surface-embroider the letters on top of the underlying Tent stitches, which is what we did here.
PRO TIP: If you surface-embroider the letters on over the top, take a photo of the canvas before you stitch it so you know where to place the letters.
2. Needlepoint Lettering in a Cross Stitch
A cross stitch doesn't have a direction so it's a great choice for thin lines in lettering. You avoid the problem that tent stitches have when lines go up and to the left—a tent stitch will create a stepped line in this situation but a single line of cross stitches will look smoother. The letter "T", below, was stitched in a single line of cross stitch. It creates a thicker, raised line and so adds emphasis to the lettering.

3. Needlepoint Lettering Using a Horizontal Satin Stitch.
This is a great way of stitching thicker letters as it gives a nice smooth, satin-y appearance.
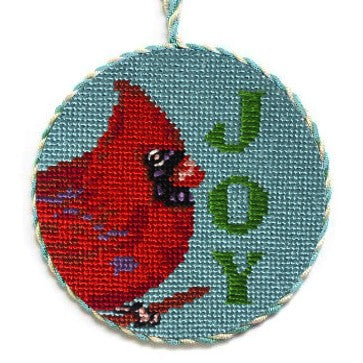
Christmas Cardinal needlepoint kit

3. Needlepoint Lettering Using a Tent Stitch
A regular needlepoint tent stitch is also a good option for many lettering situations. For Prove Them Wrong (below) we used a single line of Tent stitch.

Pro Tip #1: If your lettering is darker than the background, stitch the white or paler areas first (if you can). This will minimize the amount of shadowing caused by the dark threads. Try not to drag dark threads behind paler ones. Begin and end dark threads using adjacent dark threads.
Pro Tip #2: When stitching a decorative background around lettering, it often looks better to add a tent stitch box around the lettering so the decorative stitches don't overwhelm them—after all, it is the words you want people to read. We did this with these next two designs...


Reassuring Tip #1: Don't worry too much about individual stitch placement. It doesn't have to be perfect—people will know what you are trying to say!
We hope you find a use for these four ways to stitch needlepoint letters.
Sign up for our newsletter (bottom of the page) for more tips and tricks like these, new design releases and exclusive discounts. And, get a code for 10% off your first purchase.
